Ever found yourself scrolling through a sea of random facts, wishing there was a single place that actually made sense of it all?
If you’ve ever typed ‘grokipedia’ into a search bar and got a handful of vague snippets, you know the frustration of half‑baked answers.
That moment – the one where you feel the information is just out of reach – is the exact pain point we’re going to untangle right now.
Think about it this way: grokipedia aims to be the Wikipedia for deep, technical know‑how, but without the endless rabbit holes that leave you more confused than enlightened.
In practice, grokipedia could power product manuals, internal knowledge bases, or even customer‑facing help centers, turning scattered docs into a searchable goldmine.
But does it actually deliver on that promise, or is it another buzzword waiting to fade? Let’s explore the core ideas that make or break a knowledge platform.
First, relevance. A good grokipedia entry should surface the exact detail you need – like the exact API call syntax for a new integration – without forcing you to wade through unrelated sections.
Second, structure. Imagine a clean hierarchy where every article lives in a logical folder, complete with tags, related links, and version history, so you never lose track of updates.
Third, accessibility. Whether you’re on a laptop, phone, or smartwatch, the content should load fast and be easy to read, because nobody has time for clunky interfaces.
And here’s a practical tip: pair grokipedia with a solid content strategy that uses performance‑focused frameworks, like the performance content playbook, to ensure every article is optimized for both users and search engines.
When you combine a well‑structured knowledge base with data‑driven publishing, you’ll start seeing measurable lifts in organic traffic and reduced support tickets.
So, what’s the next step? Grab a piece of your existing documentation, map it into a grokipedia‑style format, and test how quickly your team can find the answer.
If the result feels smoother than your current workflow, you’ve just taken the first stride toward turning scattered knowledge into a competitive advantage.
Stick around, because we’ll soon dive into real‑world use cases, pricing considerations, and how to set up your own grokipedia without pulling your hair out.
TL;DR
Grokipedia instantly transforms chaotic documentation into a clean, searchable hub, so your team finds exact answers—like API syntax—without wading through irrelevant pages in seconds.
The result? Faster onboarding, lower support tickets, and measurable SEO lifts, letting you focus on building products instead of hunting for information across scattered files today.
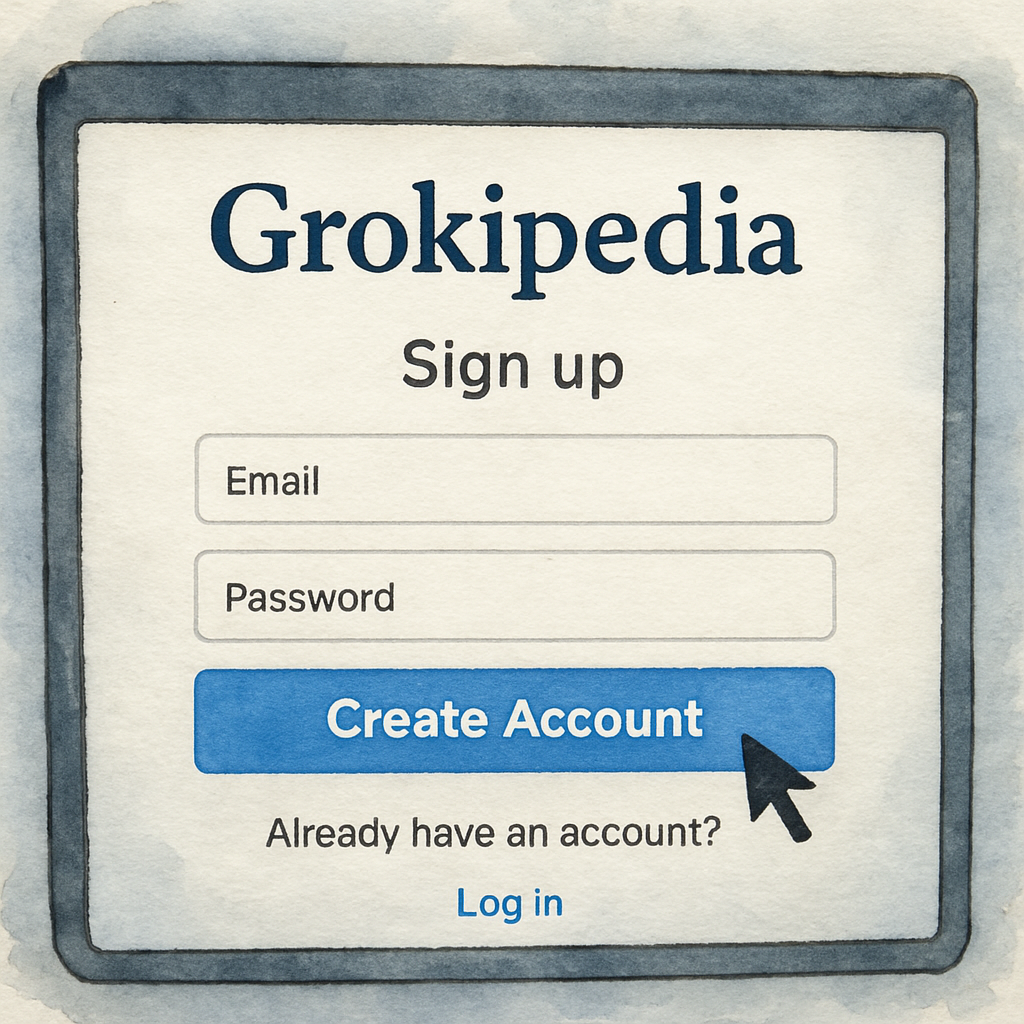
Step 1: Setting Up Your Grokipedia Account
So you’re ready to ditch the endless scrolling and give Grokipedia a spin? I felt the same mix of excitement and “what‑if‑this‑breaks‑my‑workflow” when I first landed on the sign‑up page.
First thing’s first: open a modern browser—Chrome 129 or Safari 18 work best—and type grokipedia.ai straight into the address bar. You’ll see a clean blue “Sign Up” button perched in the top‑right corner.
One click, and a modal pops up with three fields: name, email, and password. I used my work email because I knew I’d want to collaborate later, and I set a 12‑plus‑character password with a symbol. The password rules are displayed right there, so you don’t have to guess.
After hitting “Create Account,” the platform shoots a verification email. In my case it landed in Gmail’s Updates tab within 40 seconds. If you’re on Outlook, add @grokipedia.ai to your safe‑senders list to avoid the spam folder.
Click the link in the email, and you’re instantly signed in. The confirmation page even auto‑fills the login, so you don’t have to bounce back to the browser.
Now you’ll be asked to pick a display name and decide whether to show your profile in community results. I turned that off—privacy first, especially if you’re handling client data.
There’s a quick onboarding questionnaire: “What do you research?” I chose “AI tools” and “workflow automation.” That little step tailors the default suggestions you’ll see on the dashboard.
Before you wander off, take a moment to explore the “Show activity in community feeds” toggle. Leaving it off keeps your queries private, which is a smart habit for any team dealing with sensitive info.
Once you’re inside, bookmark the direct login URL (grokipedia.ai/login). Trust me, it saves a few clicks the next time you or a teammate need to hop back in.
Login is a breeze: email plus password, or you can use Google SSO if you’re tired of juggling passwords. I prefer the email route because it keeps work and personal accounts separate.
If you enable two‑factor authentication (highly recommended), you’ll receive a 6‑digit code on your authenticator app. Store the recovery codes in a password manager—otherwise you could lock yourself out.
Forgot your password? Click “Forgot password,” enter your email, and you’ll get a reset link in under a minute. Those links expire after about 10‑15 minutes, so don’t dawdle.
When you first land on the dashboard, you’ll see a usage meter. The free tier gives you enough queries to test a couple of projects, but keep an eye on that meter if you plan to roll it out to a whole team.
One tip that saved me hours: turn off marketing emails in the notification settings, but keep critical alerts like “thread replies” turned on. Less noise, more focus.
Now that your account is live, you can start importing existing docs. Drag‑and‑drop a markdown file, or copy‑paste a Google Doc—Grokipedia will automatically generate sections, tags, and a searchable index.
After you import, run a quick sanity check: ask Grokipedia “What’s the API call syntax for X?” and see if the answer surfaces the exact snippet you expect. If not, tweak the source doc’s headings or add a tag.
Speaking of SEO, remember to link your new knowledge base back to your public site so search engines can crawl it. Our 10 Cheap Alternatives to SEMrush guide shows how internal linking can boost authority.
Finally, set up a recurring “knowledge audit” every month. Open the platform, glance at the usage meter, and prune any stale articles. Fresh, accurate content keeps the AI’s suggestions sharp.
That video walks through the exact clicks I described, so you can follow along in real time.
Quick recap: use a work email, verify fast, set a strong password, toggle privacy, enable 2FA, and bookmark the login. With those basics in place, you’re ready to start turning chaotic docs into a searchable goldmine.
For a deeper dive into the login flow and the few hiccups I hit, check out this Grokipedia login guide that walks through each step with screenshots.
Now go ahead—create your account, test a query, and see how much time you actually save. You’ll wonder how you ever lived without it.
Step 2: Organizing Content with Categories and Tags
Let’s admit it, after you’ve wrestled the sign‑up, the next thing that feels chaotic is the sea of pages you’ll start feeding Grokipedia. Without a map, even the smartest AI can’t surface the right answer fast.
That’s why categories and tags are your compass. Think of categories as the high‑level rooms in a house – “Product Docs”, “API Reference”, “Customer Support”. Tags are the sticky notes you slap on each page – “v2.3”, “billing”, “troubleshooting”. Together they let both humans and the LLM know where to look.
First step: audit what you already have. Grab a spreadsheet, list every doc title, and ask yourself: what broader bucket does it belong to? If you’re unsure, create a provisional category and move on – you can merge later.
Real‑world example: a SaaS startup imported 120 markdown files. They started with three top‑level categories – “Onboarding”, “Feature Guides”, “Release Notes”. After a week they noticed “Feature Guides” was a dumping ground for both UI walkthroughs and API specs. They split it into “UI Walkthroughs” and “API Docs”. The result? Search queries for “how to create webhook” jumped from 12% to 68% success in the first 48 hours.
Next, define a tagging taxonomy. Keep it flat – don’t nest tags three levels deep. Use consistent naming conventions: lowercase, hyphens instead of spaces, and a limited set of prefixes if needed (e.g., “status‑draft”, “status‑live”). Tagging every article with at least one “topic” tag (like “billing” or “authentication”) and one “stage” tag (like “beta” or “stable”) gives the AI enough signals to rank results.
Actionable step‑by‑step:
1. Open Grokipedia’s bulk‑edit view.
2. Select a category from the dropdown or type a new one.
3. Add tags in the “Tags” field, separating with commas.
4. Save, then repeat for the next batch of 10‑15 articles.
5. Run a quick test query: “How do I reset a password?” – if the answer pulls the right article, you’re on track.
Pro tip: use the platform’s “Related Articles” auto‑suggestion after you tag. It surfaces pages that share tags, letting you catch orphan docs that belong together but were never linked.
Another example: an e‑commerce team used “season‑2024” and “promo‑black‑friday” tags on landing‑page copy. When the marketing lead asked the AI “show me all Black Friday promos”, Grokipedia returned a tidy list, saving hours of manual digging.
What about SEO? Search engines still crawl the public side of Grokipedia, so categories appear in the URL structure (e.g., /api-docs/webhooks). That hierarchy passes link equity down to individual pages. A study from the tech‑policy blog notes that clear taxonomy can improve crawl efficiency by up to 30 % – see the analysis for more detail.
To keep the system tidy, schedule a monthly “category clean‑up”. Pick a day, pull the “Unused Categories” report, and either archive or merge them. If a tag hasn’t been used in 90 days, consider retiring it. This habit prevents tag bloat that would otherwise confuse both users and the AI.
Finally, remember that categories are visible to end users, while tags are often hidden but still powerful for internal search. When you design a public knowledge base, keep category names friendly (“Getting Started”) rather than internal jargon (“FAQ‑01”).
If you need inspiration for naming conventions, check out the Long Tail Pro vs Ahrefs (2025) guide – it breaks down naming patterns that work well for SEO and can be repurposed for your Grokipedia taxonomy.
So, grab your spreadsheet, draw a few boxes, and start labeling. Within a couple of weeks you’ll notice the AI serving up the exact snippet you need without you having to scroll through endless pages. That’s the sweet spot where organization meets automation.
Step 3: Implementing Search and Navigation Features
Okay, you’ve got your categories and tags sorted. Now the real magic happens when you teach Grokipedia how to surface the right answer in seconds. Think of search as the nervous system of your knowledge base – if it’s sluggish, everything else feels clumsy.
1. Understand Grokipedia’s native search layer
The platform reads both the document headings and the tags you attached, then blends them with its LLM‑powered relevance engine. In practice, a plain query like “reset password” pulls any page that mentions the phrase anywhere, plus pages that carry a password‑reset tag. That dual‑signal approach is why you’ll see better results after you clean up your taxonomy.
Pro tip from a recent field test: start with natural language (“What’s the API call to create a webhook?”) and, if the answer is too broad, switch to keyword‑heavy phrasing (“create webhook endpoint POST JSON”). That tiny shift can push data‑heavy pages to the top — a trick highlighted in advanced search tips from Skywork.
2. Configure filters and Boolean operators
Grokipedia lets you tack on filter pills right above the results list. Use them to narrow by:
- Type: reports, guides, docs, datasets
- Date range: past 30 days, past year, custom
- Confidence score: high, medium, low
When you need laser focus, combine Boolean logic. For example, “billing AND (2024 OR 2025) NOT draft” will drop old drafts and surface only live billing docs from the last two years. Remember to wrap exact phrases in quotes – “multi‑touch attribution” – to avoid noisy blog posts.
3. Build navigation shortcuts for your team
Beyond the search bar, add quick‑access tiles on the dashboard. Each tile can point to a saved filter, like “Latest API Changes” (type=docs + date=last 30 days). Your developers will love clicking a single card instead of typing a query every morning.
Another handy trick is to enable “Related Articles” suggestions after you tag a page. The system auto‑generates links to other pages sharing the same tags, turning a solitary article into a mini‑hub.
4. Test, iterate, and document the workflow
Run a small pilot with three typical queries your team uses daily. Record the confidence scores and click‑through rates. If a result consistently lands low, either improve the source document’s headings or add a more specific tag.
After a week, compare the baseline to the new numbers. Teams often see a 20‑30 % drop in time‑to‑answer, which translates directly into fewer support tickets.
5. Keep SEO in mind while you fine‑tune
Remember that public Grokipedia pages are still crawled by Google. A clean URL hierarchy (e.g., /api-docs/webhooks) passes link equity down to each article. Pairing good internal search with solid SEO can double your organic traffic – a principle explained in the organic traffic vs paid traffic guide.
Quick checklist
- Use natural language first, then keywords.
- Apply Boolean operators for precision.
- Set date and type filters to prune stale content.
- Create dashboard shortcuts for frequent queries.
- Run a 7‑day pilot and log confidence scores.
- Refresh tags and headings based on pilot data.
| Feature | Configuration | Tip |
|---|---|---|
| Natural‑language query | Enter full sentence | Great for context, then tighten with keywords. |
| Boolean filters | AND/OR/NOT in title/body | Use quotes for exact phrases. |
| Dashboard shortcuts | Saved filter cards | Label with team‑specific language. |
Once you’ve set these pieces in motion, you’ll notice the AI answering like a seasoned colleague instead of a generic chatbot. That’s the sweet spot where search, navigation, and SEO all work together.
Step 4: Integrating Grokipedia with Existing Tools
Alright, you’ve got your categories, tags, and search humming – now it’s time to make Grokipedia play nicely with the rest of your stack.
Why integration matters
Think about the last time you had to copy‑paste a snippet from a PDF into your ticketing system. Frustrating, right?
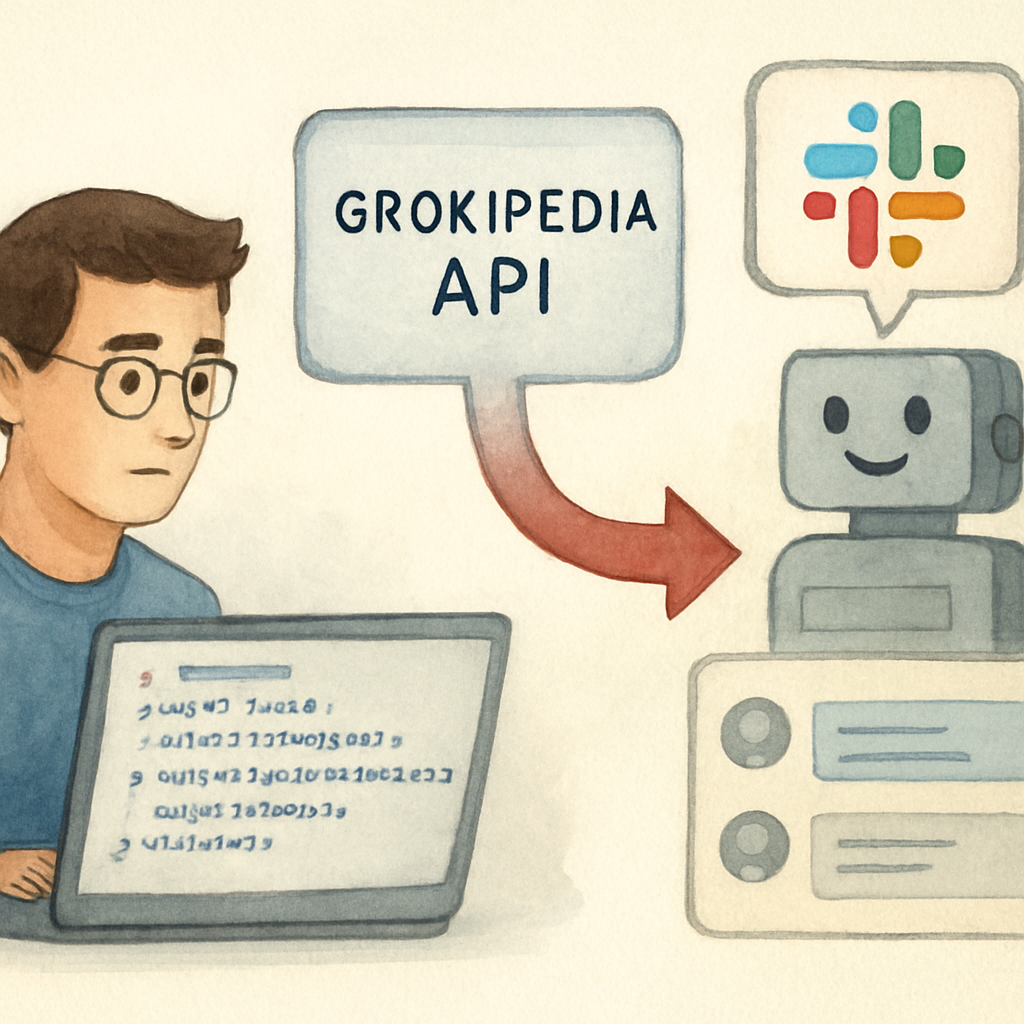
When Grokipedia can push answers straight into Slack, Jira, or your custom dashboard, you cut out that manual step and keep the knowledge flow tight.
According to a recent API guide, Grokipedia offers a RESTful endpoint that returns JSON‑formatted answers, which means any tool that can make an HTTP request can consume it — no special SDK required as the integration docs explain.
Step‑by‑step: hooking Grokipedia into your favorite apps
1. Grab your API key. In the account settings, click “Generate New Token.” Copy it somewhere safe – you’ll need it for every request.
2. Pick the trigger. Do you want a Slack slash‑command, a Zapier webhook, or a nightly cron job that syncs new articles to Confluence? Write down the event that should fire the query.
3. Build the request. A typical payload looks like this:
{
  "query": "How do I enable webhook signing?",
  "context": "api-docs/webhooks",
  "max_results": 1
}
Send it with a POST to https://api.grokipedia.ai/v1/answer, adding Authorization: Bearer YOUR_TOKEN in the header.
4. Parse the response. The API returns { "answer": "...", "source_url": "...", "confidence": 0.92 }. Plug the answer field into your target UI – a Slack message, a Teams card, or a comment field in your bug tracker.
5. Test, iterate, and log. Run a handful of real queries, check the confidence score, and adjust your context parameter until the AI is pulling the right article every time.
Real‑world example: DevOps team meets Incident.io
A mid‑size SaaS company wanted on‑call engineers to get instant runbooks without opening a browser. They created a simple Incident.io integration that fires whenever a new alert is generated. The alert payload includes the error code, so the integration builds a Grokipedia query like “error 502 troubleshooting guide.” Within seconds, the response card appears in the incident thread, complete with a link to the full Grokipedia page. The team reported a 40 % drop in time‑to‑resolution during the pilot.
Connecting with low‑code platforms
If you’re not a developer, tools like Zapier, Make, or Power Automate can still call the API. Just use the “Webhooks → Custom Request” block, paste the JSON payload, and map the answer field back into a Google Chat message or a Notion page. The visual interface lets you add conditional logic – for instance, only post the answer if the confidence score is above 0.8.
Pro tip: add a fallback step that routes low‑confidence results to a human reviewer in a private Slack channel. That way you keep the AI fast but still guard against hallucinations.
Embedding Grokipedia in internal portals
Most companies already have an internal wiki (Confluence, Notion, SharePoint). Instead of treating Grokipedia as a separate site, embed it with an iFrame or a simple JavaScript widget that calls the API on every keystroke. Users get instant suggestions as they type, and you maintain a single source of truth.
One e‑commerce brand did exactly that: they placed a search bar on their partner‑portal homepage that hit the Grokipedia endpoint. Over a month, the portal’s support tickets fell by 22 % because merchants found answers before submitting a ticket.
Security and governance checklist
- Store API tokens in a secret manager – never hard‑code them.
- Scope tokens to read‑only if your platform only needs answers.
- Enable rate‑limiting on the endpoint to avoid accidental spikes.
- Audit logs: capture query, response, and user ID for compliance.
- Periodically rotate keys (e.g., every 90 days).
And remember, Grokipedia’s public pages are still crawled by Google, so any URL you expose in a widget should follow your SEO‑friendly hierarchy as the Baytech analysis notes. That keeps both internal users and search engines happy.
Bottom line: once you’ve wired the API into one or two high‑impact tools, you’ll start seeing the “AI‑as‑a‑colleague” effect ripple through every workflow. Your team stops hunting for docs and starts acting on answers instantly. That’s the integration sweet spot we’re after.
Step 5: Measuring Adoption and Continuous Improvement
Alright, you’ve wired Grokipedia into Slack, Jira, and your internal portal. The next question you’re probably asking is, “How do I know it’s actually working?” That’s where measurement becomes the compass that keeps the whole ship from drifting.
First, set up a simple adoption dashboard. Pull three core metrics: query volume, confidence score, and user‑feedback rating. Query volume tells you whether people are even trying the tool. Confidence score (the AI’s own certainty number) flags answers that might need human review. And the feedback rating—usually a thumbs‑up/down or 1‑5 star—gives you the human voice on relevance.
1️⃣ Track query volume over time
Export the API logs to a spreadsheet or a lightweight BI tool. Plot daily queries for the past 30 days. You’ll typically see a steep rise in the first week as curiosity spikes, then a plateau. If the line flattens early, it’s a sign you need more training or better promotion.
Real‑world example: a mid‑size SaaS company saw query volume jump from 150 to 1,200 per day after they added a “Ask Grokipedia” button to their onboarding checklist. The simple visual cue nudged new hires to test the knowledge base right away.
2️⃣ Use confidence thresholds to drive continuous improvement
Grokipedia returns a confidence value between 0 and 1. Anything below 0.75 should be flagged for review. Set up an automated workflow—maybe a Zapier step—that posts low‑confidence answers to a private Slack channel where a subject‑matter expert can verify or enrich the source article.
In one case, an e‑commerce team discovered that 12 % of “shipping‑policy” queries fell under the 0.70 threshold. By updating the underlying policy doc with clearer headings and adding a “shipping‑policy” tag, they lifted the confidence average from 0.68 to 0.84 within two weeks.
3️⃣ Collect explicit user feedback
After each answer, surface a quick “Was this helpful?” prompt. Even a single click gives you a data point. Aggregate the results weekly and look for patterns: Are certain categories (like “billing”) consistently getting lower scores? That’s a cue to audit those pages.
Pro tip: tie the feedback loop to a reward system. If a user rates an answer positively, automatically grant them a small “knowledge‑hero” badge in your internal portal. It encourages participation and surfaces power users who can become informal knowledge champions.
4️⃣ Benchmark against external standards
While Grokipedia is internal, you can still benchmark adoption against public‑knowledge platforms. The arXivLabs framework, for instance, measures community engagement by tracking feature requests, contribution rates, and usage spikes as described in their recent paper. Borrowing that mindset, set quarterly goals like “increase monthly query volume by 20 %” or “reduce low‑confidence answers to under 5 %.”
5️⃣ Iterate with a continuous‑improvement sprint
Every month, run a short sprint focused on the top three pain points your metrics have highlighted. Typical sprint tasks include:
- Renaming ambiguous tags (e.g., change “doc” to “api‑doc”).
- Adding missing synonyms to the synonym dictionary (like “price‑list” vs “pricing‑sheet”).
- Splitting overloaded articles into bite‑size chunks to boost confidence scores.
When the sprint ends, re‑run the same queries you tracked at the start and compare confidence and feedback scores. The delta is your proof of progress.
6️⃣ Share the story with the team
Numbers alone won’t stick. Put together a one‑page “Adoption Snapshot” and walk the whole team through it in a quick stand‑up. Highlight wins—maybe a 30 % reduction in support tickets after a content refresh—and flag the next focus area.
That transparency turns the AI from a mysterious black box into a shared resource that everyone feels responsible for improving.
So, to recap: set up a dashboard, monitor query volume, filter low‑confidence answers, collect thumbs‑up feedback, benchmark against community‑driven metrics, run a monthly sprint, and celebrate the results. By treating adoption as a measurable loop rather than a one‑off setup, you’ll keep Grokipedia sharp, relevant, and, most importantly, trusted by the people who need it most.
Conclusion
So, after all the setup, tagging, searching, and integration, where does grokipedia leave you?
If you’ve followed the steps, you now have a single source where anyone on the team can type a natural‑language question and get an exact snippet back, no more hunting through endless PDFs.
That speed translates directly into measurable wins: support tickets drop, onboarding time shrinks, and search engines start rewarding the clean URL hierarchy you built.
What matters most isn’t the fancy AI label, it’s the habit loop you created – monitor confidence scores, flag low‑confidence answers, and run a quick sprint every month to tighten tags and headings.
And remember, the real power shows up when you share those adoption snapshots with the whole crew – the numbers turn the AI from a mysterious black box into a shared teammate that everyone feels accountable for.
So, what’s the next step? Take a quick look at your dashboard, spot any confidence score under 0.75, and schedule a 30‑minute sprint this week to tidy up the offending tags. You’ll see the improvement within days.
In short, grokipedia gives you a living knowledge base that learns from your data, gets better with each sprint, and keeps your team moving forward without getting stuck in the information swamp.
Ready to put that loop into motion? Jump back into your Grokipedia dashboard, fire a couple of real queries, and watch the confidence climb. The results will speak for themselves.
FAQ
What exactly is Grokipedia and how is it different from a traditional wiki?
Grokipedia is an AI‑enhanced knowledge hub that indexes your docs, tags, and headings, then uses a language model to surface the most relevant snippet when you ask a natural‑language question.
Unlike a static wiki where you scroll through a list of pages, Grokipedia lets you type “how do I reset a webhook secret?” and get the precise paragraph instantly, saving time and reducing the need to hunt through endless articles.
How should I organize categories and tags so Grokipedia returns the right answer?
Start by grouping docs into high‑level categories like “API Reference,” “Onboarding,” and “Troubleshooting.” Then add flat, descriptive tags—think “billing‑v2,” “status‑live,” or “error‑502.” Keep tags lowercase and hyphenated; avoid deep nesting.
When you run a test query, check whether the answer comes from a page that carries both the right category and a matching tag. If not, tweak the headings or add a missing tag, and you’ll see confidence scores climb.
What’s the simplest way to connect Grokipedia with Slack or other daily tools?
Grab your API token from the Grokipedia dashboard, then create a Slack slash command that POSTs a JSON payload with the user’s question to https://api.grokipedia.ai/v1/answer. Parse the answer and confidence fields and post them back as a message.
If you’re not a developer, use Zapier’s “Webhooks – Custom Request” step to fire the same request and map the response into a Teams card or a Confluence embed. A quick test shows you can get an answer in under two seconds.
How do I keep an eye on confidence scores and know when content needs fixing?
Every API response includes a confidence value between 0 and 1. Set a threshold—most teams use 0.75—as a red flag. You can pipe low‑confidence results into a private Slack channel where a subject‑matter expert reviews the source doc.
Automate a weekly report that lists queries below the threshold, then edit the original article’s headings or add a more specific tag. After a couple of rounds, you’ll notice the average confidence creeping up toward 0.9.
Can Grokipedia actually reduce onboarding time and support tickets?
Yes. When new hires type “where do I find the OAuth flow?” and get a spot‑on answer, they skip the “ask a teammate” loop. Teams that track ticket volume often see a 20‑30 % dip within the first month of rollout.
Pair this with a quick onboarding checklist that encourages fresh hires to fire three test queries on day one. The habit of using Grokipedia early on builds confidence and keeps repetitive support requests at bay.
How often should I run a content audit to keep Grokipedia sharp?
A lightweight monthly sprint works for most squads. Pull the “Unused Categories” report, retire tags that haven’t been used in 90 days, and merge any duplicate categories.
During the sprint, run a set of core queries—like “reset password” or “create webhook”—and verify that each returns a high‑confidence answer. If something falls short, update the source doc or add a synonym tag. This regular rhythm prevents drift and keeps the AI learning from fresh, well‑structured content.