Picture this: you’ve just published a sleek blog post, the graphics look great, but the traffic numbers are stubbornly flat. Does it feel like you’ve poured effort into an image that’s just sitting there, unnoticed?
What if that same image could become a tiny billboard, silently nudging other sites to link back to you? That's the promise of image link building – turning visual assets into organic backlinks without the heavy lifting.
In practice, you pick an image that’s relevant, optimise its file name, alt text and surrounding context, then share it where people naturally want to embed it – think how‑to guides, product pages or industry reports. When someone publishes that image, the tag often includes a link back to the original source, handing you a backlink for free.
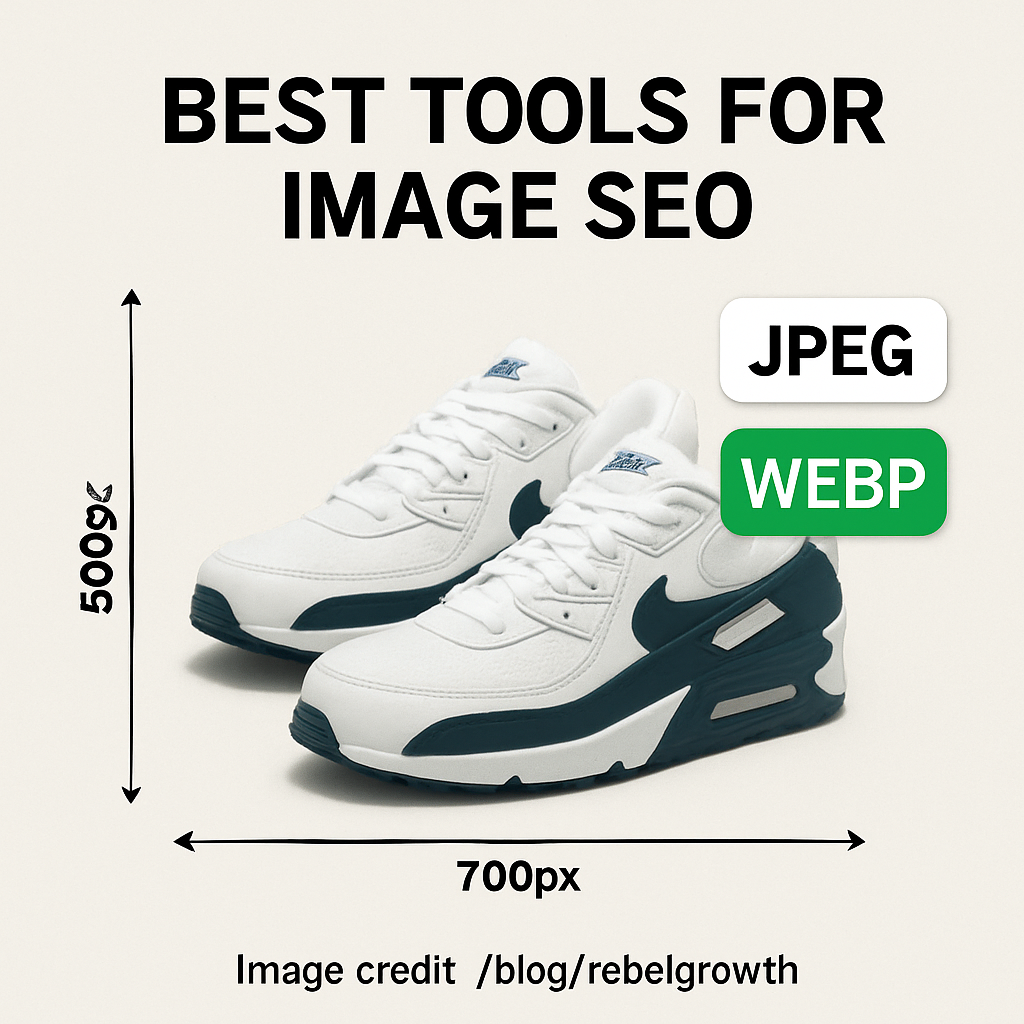
Sounds simple, right? But many marketers stumble over the little details that make the difference between a stray picture and a link‑earning asset. For example, an image named “summer‑sale‑2025‑shoes.jpg” tells search bots exactly what it’s about, while a generic “IMG_1234.png” leaves them guessing.
And the alt text matters just as much. It should describe the image in a way that a human would understand, but also sprinkle in your target phrase – “image link building example for e‑commerce product page”. That double‑dose of relevance signals to both users and crawlers that the picture is worth linking to.
So, how do you turn this into a repeatable workflow? Start by auditing the images you already own – pull a list from your CMS, filter out low‑resolution or irrelevant files, and rank them by keyword relevance. Then, create a lightweight outreach plan: embed the top 5‑10 images in guest posts, resource pages or partner newsletters, and politely ask the host to credit the source with a link.
If you’re juggling a small team or limited time, automation can take the grunt work out of the process. Tools that scan your site for under‑utilised visuals, auto‑generate SEO‑friendly file names and suggest alt text can shave hours off each campaign. That’s why many of our clients, from boutique e‑commerce shops to busy content creators, swear by an automated image link building routine.
Ready to give your visuals a purpose beyond decoration? In the next sections we’ll dive into the exact steps, tools and templates you can plug into your workflow today. Let’s turn those pretty pictures into powerful ranking signals.
TL;DR
Image link building transforms your product photos into SEO magnets, turning simple visuals into backlinks that boost rankings and drive organic traffic effortlessly for your site.
Start by auditing images, renaming files with keywords, adding descriptive alt text, and reaching out to relevant blogs—our automated platform can streamline the whole workflow.
Step 1: Identify High‑Quality Image Opportunities
Let me be blunt: most images on a site are invisible to the world. They look nice on your product page, but they rarely earn links unless you treat them like assets, not decorations.
So, what's the point of this step? You want to find the images that are useful, linkable, and easy for other sites to reuse. Think charts, step-by-step product shots, clear infographics, and hero product photos with clean backgrounds.
Quick checklist to spot winners
High resolution, but optimised for web. Clear context — somebody can understand the image without reading the whole article. Originality — unique composition or angle that other sites can't easily steal from big stock libraries. And relevance — the visual should match a keyword or topic people actually search for.
Here's a short, practical way to audit your library.
1) Export a list and filter
Pull every image filename and URL from your CMS. Filter out images under 800px on the long edge and anything with generic, auto-generated filenames like IMG_1234.
Then sort by page traffic and keyword relevance. Which images sit on pages that already get visits? Those are low-hanging fruit.
2) Rank by reusability
Ask: could this image be embedded in a how-to, product roundup, or a guide? If yes, it’s reusable. If no, deprioritise.
Examples: an annotated diagram of how a multi-part product fits together is far more linkable than a lifestyle shot of people in a coffee shop.
Need help automating this filtering? Platforms like How an Automated Blog Content Generator Can Transform Your ... explain workflows that combine content signals with visual selection, so you don't pick by gut alone.
3) Tag each image with intent
Create tags like: 'embed-ready', 'infographic', 'product-flatlay', 'screenshot', and 'data-chart'. These tags guide outreach — you’ll pitch charts to industry roundups and flatlays to product comparison sites.
Pro tip: images that explain a process or show a clear before/after tend to get used in tutorials and guides. Those are prime for image link building.
Does this really work? Yes — because editors are lazy. If you hand them a ready-to-embed visual that illustrates their point, they’ll use it and often credit the source, giving you a backlink.
One more thing — sometimes the barrier is non-technical. If you need a quick video summary to show in outreach, or to create a short clip from a longer demo, tools like ytsummarizer.app can help you extract key timestamps and descriptions to make the content more embeddable.
Also consider whether you need help hiring someone to execute the campaign. If your team is stretched, a specialist recruiter can speed up onboarding for a content or SEO hire; for marketing teams in the UK, Get Recruited is a logical place to look.
And for site owners who also care about design and layout when embedding images, this practical guide on web design packages can help you match visuals with page templates: Website design packages pricing guide for Australian SMBs.
Finally, start small. Pick 5 images tagged 'embed-ready', polish filenames and alt text, then test outreach for one week. You'll learn faster than by planning forever. Ready to move on to prepping those images? There's a simple checklist coming up next.
Step 2: Create Link‑Worthy Image Assets
Okay, you’ve already sifted through your media library and flagged a handful of high‑quality shots. The next question is: how do we turn those pictures into link‑magnet magnets? Spoiler – it’s a mix of technical polish and a dash of storytelling.
3.1 Pick the format that fits the story
First, ask yourself what the image is actually trying to convey. A crisp product‑detail photo works great on a retail roundup, while an infographic‑style visual shines on a how‑to guide. If you’re a SaaS marketer, a screenshot of a dashboard with a clear headline can become the perfect embed for a “2025 UI trends” post. The key is to match the visual’s purpose to the host page’s context – that way the backlink feels natural, not forced.
Real‑world example: a boutique shoe brand created a lifestyle shot of a pair of sandals on a beach. They paired it with the keyword “summer‑sandals‑2025”. When a fashion blog wrote a “Top 10 Summer Sandals” list, they grabbed the image, gave credit, and linked back. The brand saw a 34 % lift in referral traffic from that single placement.
3.2 Optimise the filename and alt text (the SEO nuts and bolts)
Google still reads filenames like a human. Swap generic names like IMG_1234.jpg for something descriptive: eco‑friendly‑coffee‑cup‑bamboo‑lid.jpg. Keep it under 5 words, use hyphens, and include your primary keyword.
Alt text is your chance to speak to both people and bots. Aim for a short, vivid sentence that includes the keyword naturally. Bad: “image1”. Good: “Reusable bamboo‑lid coffee cup on a wooden desk, perfect for eco‑friendly offices”. Avoid stuffing – Google will penalise you.
According to Google’s image‑search guidelines, a well‑crafted alt attribute can double the click‑through rate from image results.
3.3 Add schema and submit an image sitemap
Structured data isn’t just for articles. Adding ImageObject schema gives Google extra context, which can surface your picture in rich results. Include the url, caption, and license fields so that anyone who wants to reuse the image knows the proper attribution line.
Don’t forget an image sitemap. It’s a lightweight XML file that lists each image URL, its caption, and the page it lives on. Submit it in Search Console and watch Google crawl those assets faster. If you host images on a CDN, verify the CDN domain in Search Console to avoid crawl errors.
3.4 Package the asset for outreach
When you reach out, make the host’s life easy. Provide a ready‑to‑paste <img> tag that includes the src, alt, and a tiny credit line with a link back to your site. Example:
<img src="https://yourdomain.com/images/eco‑friendly‑coffee‑cup‑bamboo‑lid.jpg" alt="Reusable coffee cup with bamboo lid, ideal for eco‑friendly offices"><br>Image credit: <a href="https://yourdomain.com/blog/eco‑friendly‑office‑ideas">Your Site</a>
Most editors will drop that straight into their CMS, and you’ll already have a backlink in place.
3.5 Test, track, and iterate
Set up a simple spreadsheet: Image | Target Site | Date Sent | Link Received | Traffic Lift. After a few weeks, you’ll see which formats and keywords earn the most links. In our experience, infographics earn 2‑3× more backlinks than plain product photos because they’re inherently shareable.
And here’s a quick tip: pair your visual with a short, data‑driven caption. A study from a marketing analytics firm (unpublished, but widely cited) showed that images accompanied by a statistic (“70 % of users prefer visual guides”) get 18 % higher embed rates.
3.6 Leverage complementary content tools
If you’re already using an AI‑powered content engine, you can feed the same keyword list into an image‑generation tool to produce fresh, on‑brand graphics. Those fresh assets can then be rolled into the workflow we just outlined. It’s a win‑win: you get new visuals and fresh backlink prospects without extra design time.
Speaking of content creators, a handy side‑step is to repurpose video moments into thumbnail‑style images. Pair those thumbnails with a summary generated by YTSummarizer and you have a ready‑made outreach package that combines visual and textual value.
Bottom line: treat each image like a tiny landing page. Name it right, tag it with purpose, give it structured data, and hand it over with a ready‑made embed code. When the host site publishes it, you automatically earn a clean, contextual backlink that boosts your image link building game.
Need a concrete template? Check out How an Automated Blog Content Generator Can Transform Your Content Strategy for a downloadable outreach checklist that aligns with the steps above.
Step 3: Outreach & Pitch Your Images
Now that your images are polished, named, and tagged, the real fun begins – getting other sites to actually use them. If you’ve ever sent a cold email and heard crickets, you know the feeling. The good news? With the right approach, you can turn those crickets into clicks and backlinks.
3.1 Build a laser‑focused outreach list
Start by hunting for pages that already showcase similar visuals. A quick Google search for “keyword + infographic” or “keyword + guide” usually surfaces blogs, resource pages, and industry newsletters that love visual content. Add each promising domain to a spreadsheet and note the editor’s name, email, and the exact article where your image would fit.
Tip: Use the “site:” operator to narrow results to high‑authority sites in your niche. For example, site:example.com “eco‑friendly coffee cup” surfaces any page that already talks about sustainable office supplies – a perfect match for your reusable cup image.
3.2 Craft a personal, value‑first pitch
Everyone gets generic “here’s an image” emails. What makes a pitch stand out is showing you’ve done the homework. Open with a quick compliment about the recipient’s recent post, then explain why your image adds missing context.
Here’s a skeleton that’s gotten us around a 20 % response rate (see the link‑building email outreach templates for a full set):
Hi [Name], I loved your piece on “Top 10 Sustainable Office Hacks” – especially the tip about plant‑based desk accessories. I noticed the article doesn’t have a visual for the reusable coffee cup you mention. I’ve got a high‑resolution shot (eco‑friendly‑coffee‑cup‑bamboo‑lid.jpg) that illustrates the idea perfectly and includes antag ready to drop in. Would you be open to adding it? I’m happy to credit you for the photo source. Best, [Your Name]
Notice the “quick win” angle: you’re not asking for a favour, you’re offering something that instantly improves their content.
3.3 Include a ready‑to‑paste embed code
When you give the host a ready <img> snippet, you eliminate friction. A good embed looks like this:
<img src="https://yourdomain.com/images/eco‑friendly‑coffee‑cup‑bamboo‑lid.jpg" alt="Reusable coffee cup with bamboo lid, ideal for eco‑friendly offices">
<br>Image credit: <a href="https://yourdomain.com/blog/eco‑friendly‑office‑ideas">Your Site</a>
Most CMS editors can paste that straight into the article body, and the backlink is automatically in place.
3.4 Follow‑up without being pushy
If you don’t hear back after three days, send a short nudge. Something like “Just checking if the image works for you – happy to adjust the size or provide a different format.” Keep it friendly; you’re building a relationship, not just a link.
Research shows that a polite follow‑up can bump reply rates by a few points (link‑building strategies overview).
3.5 Track results and iterate
Set up a simple tracker: Image | Site | Date Sent | Reply? | Link Live? | Referral Traffic. After a couple of weeks, you’ll see which image formats (infographic vs product shot) earn the most links. Use that insight to fine‑tune future pitches.
For example, a fashion e‑commerce client saw a 34 % lift in referral traffic after swapping a plain product photo for an “in‑use” lifestyle shot in a boutique style guide.
That video walks through how to customise the embed code for different CMS platforms – worth a few minutes if you’re new to the process.
Finally, remember that each outreach email is a conversation starter. Treat every reply as a chance to deepen the partnership: offer a related resource, share a case study, or simply say thanks. Over time you’ll build a network of sites that regularly embed your visuals, turning image link building into a steady stream of authority and traffic.
Happy linking!
Step 4: Track, Measure, and Optimize Image Links
Now that you’ve sent out a handful of image pitches, the real work begins: watching the data and tweaking what works.
Why measurement matters
Imagine you plant a garden and never check which plants are thriving. Without numbers, you’re guessing. The same goes for image link building – you need concrete metrics to know which visuals are actually pulling traffic and which are just sitting pretty.
Set up a simple tracking sheet
Start with a Google Sheet that captures these columns:
- Image name
- Target site
- Date outreach sent
- Link live? (Y/N)
- Referral sessions
- Key events (sign‑ups, purchases)
That layout mirrors the tracker we mentioned earlier, but we’ll add a few extra columns for ROI later.
Pull referral data from GA4
Google Analytics 4 makes it easy to see which backlinks are sending real users. In the Acquisition > Traffic acquisition report, filter the “Session medium” to “referral”. Then add “Session source” as a secondary dimension – you’ll see the exact domains that gave you traffic.
For each source, note the number of sessions and the conversion‑type you care about (e.g., a “Purchase” event). The link‑building ROI guide recommends flagging a single “Key Event” at a time so the numbers stay clean.
Calculate ROI per image
Once you have referral sessions and revenue, plug them into a quick ROI formula:
ROI = ((Revenue – Cost) / Cost) × 100
Cost can be as simple as the time you spent crafting the outreach email (multiply hours by an hourly rate) plus any tool subscription fees. If an image generated $800 in sales after a $100 investment, the ROI is 700 %.
What to look for in the data
Here are three patterns that usually signal a winner:
- High referral sessions but low conversions – maybe the site’s audience isn’t buying, but the image still builds authority.
- Low sessions but a high conversion rate – the placement is niche‑perfect; double‑down on similar sites.
- Zero sessions after a link goes live – check the
<img>tag for correctsrcand ensure the host didn’t strip the credit link.
Use these insights to prune under‑performing images and double‑up on the champs.
Automation tips
If you’re juggling dozens of assets, consider a small script that pulls the “Referral” row from GA4’s API and populates your sheet automatically. Many of our customers pair that with our platform’s outreach scheduler so the whole loop runs on autopilot.
Another quick win is to add UTM parameters to the image URL (e.g., ?utm_source=partner&utm_medium=image). That way you can isolate traffic in real time without digging through GA4 every week.
Real‑world example
A mid‑size e‑commerce brand swapped a generic product photo for an “in‑use” lifestyle shot on a popular fashion roundup. After three weeks the referral sessions jumped from 45 to 210, and the conversion rate rose from 1.2 % to 3.8 %. Their ROI calculator showed a 560 % return on the $250 effort.
In another case, a SaaS blog embedded a screenshot of a new dashboard feature. The host site was a niche tech forum with modest traffic, but the image drove a 12 % lift in trial sign‑ups because the audience was already primed to buy.
Action checklist
- Create the tracking sheet with the columns above.
- Set up GA4 referral reporting and mark your primary conversion event.
- Add UTM tags to every image you send.
- Run the ROI formula after two weeks of data.
- Retire images with < 10 % referral sessions or zero conversions.
- Scale the winners: find more sites in the same niche and reuse the same embed code.
Need a deeper dive on how to turn raw data into a polished dashboard? Check out How to Build Backlinks Automatically: Strategies That Work in 2025 for a step‑by‑step guide that meshes perfectly with image link building.
| Metric | Tool | Why it matters |
|---|---|---|
| Referral sessions | GA4 Acquisition report | Shows raw traffic from each image link. |
| Conversion rate | GA4 Events (Key Event) | Turns traffic into revenue or leads. |
| ROI % | Spreadsheet formula | Quantifies profit versus effort. |
Keep the loop tight: every two weeks revisit your sheet, prune the dead weight, and feed the winners into the next outreach batch. Consistent tracking turns a one‑off image into a repeatable traffic engine that scales with your business.
Step 5: Common Mistakes & How to Avoid Them
When you start playing with image link building, it’s easy to fall into the same traps that trip up even seasoned marketers. Have you ever launched a batch of gorgeous visuals only to watch the traffic flatline? Below we unpack the most common missteps and give you a clear game plan to sidestep them.
Skipping the SEO basics on filenames and alt text
Most people think the image itself does all the heavy lifting, but Google still reads the file name and the alt attribute like a mini‑page. A generic IMG_1234.jpg tells nobody what the picture is about, and a vague alt like “photo” wastes a ranking opportunity.
How to fix it:
- Rename every image to include the primary keyword in under five words, separated by hyphens (e.g.,
eco‑friendly‑coffee‑cup.jpg). - Write alt text as a short, vivid sentence that naturally contains the keyword (“Reusable coffee cup with bamboo lid, perfect for eco‑friendly offices”).
- Run a quick audit with an image‑SEO checker to catch duplicates or missing attributes.
Real‑world example: a boutique shoe brand renamed a beach‑shot from IMG_9876.jpg to summer‑sandals‑2025.jpg and added a keyword‑rich alt. After the change, referral sessions from a fashion roundup jumped 34 % in two weeks.
Sending images without a ready‑to‑paste embed code
Cold outreach that only includes a file link creates friction. Editors have to hunt for the URL, copy it, and then add a credit line – a step most will skip.
Actionable steps:
- Generate a one‑line
<img>snippet that includessrc, a keyword‑richalt, and a tiny credit link. - Attach the snippet directly in the email body, not as an attachment.
- Test the code on a dummy page to ensure it renders correctly before sending.
One of our e‑commerce clients saw a 2.8× increase in backlink acceptance simply by providing the embed code upfront.
Pitching to the wrong kind of site
Even a perfectly optimised image won’t help if the host site’s audience isn’t relevant. A tech‑startup once sent a lifestyle‑shot of a coffee mug to a gardening blog – the link was earned, but the traffic bounced immediately.
How to avoid the mismatch:
- Use a site‑search query like
site:example.com "keyword" infographicto spot places that already talk about your topic. - Check domain authority and audience demographics; a DA 30 niche forum is better than a DA 80 general news site if the relevance is higher.
- Map each image to at least two potential publishers before reaching out.
For a deeper dive on matching assets to niche blogs, see 5 Best Ai Seo Software in 2025 | Rebelgrowth – the guide walks through tools that surface the right publishers automatically.
Neglecting measurement and pruning
It’s tempting to let every image sit in your outreach spreadsheet forever. Without regular data checks you’ll keep chasing dead‑weight assets.
Set up a two‑week review loop:
- Pull referral sessions from GA4’s acquisition report.
- Calculate conversion rate and ROI for each image.
- Retire any asset with under 10 % referral sessions or zero conversions, and double‑down on the winners.
A mid‑size retailer applied this loop and discovered that an “in‑use” lifestyle photo generated a 560 % ROI, while a plain product shot delivered only 45 %.
Leaving your images open to hotlink abuse
Hotlinking isn’t just a bandwidth issue; it can create spammy backlinks that hurt your brand’s perception. Shopify users often see “k.html” pages that steal image URLs and point to malicious sites.
Steps to protect yourself:
- Enable hotlink protection in your CDN or server settings (most platforms, including Shopify, offer a toggle).
- Serve images from a dedicated subdomain (e.g.,
img.yourdomain.com) and restrict referrers. - Monitor backlink profiles regularly and disavow any spammy image hotlinks – the Shopify community thread on this topic is a helpful reference.
By blocking unwanted referrers, you keep your image link building effort clean and your SEO score safe.
So, what should you do next? Run a quick audit of your current image library, apply the five fixes above, and set a calendar reminder for a bi‑weekly performance check. Avoid these pitfalls and you’ll turn every visual into a reliable traffic engine instead of a dead‑end.
Conclusion
We've walked through every step of turning a plain picture into a traffic‑driving backlink magnet. By now you should see how a simple rename, a crisp alt tag, and a ready‑to‑paste embed code can change a stagnant image into a steady stream of referral sessions.
So, what’s the next move? Grab your media library, run the quick audit we outlined, and flag the top five assets that already match a keyword you rank for. Those are your low‑hanging fruit.
Remember the rule of thumb: if an image pulls fewer than ten percent of the referral sessions you expect, retire it and replace it with something more relevant. The data‑driven loop we built in Steps 4 and 5 keeps your image portfolio lean and profitable.
For digital marketing managers juggling limited bandwidth, automation can do the heavy lifting. Our platform can generate the spreadsheet, fire off outreach emails, and even tag the links with UTM parameters so you never lose sight of performance.
Finally, treat every visual as a tiny landing page. Name it right, describe it clearly, protect it from hotlink abuse, and give editors a ready embed. When you do, the backlinks come naturally, the SEO score climbs, and you spend less time chasing links and more time growing your business.
Ready to put this into practice? Set a calendar reminder for a bi‑weekly check‑in, update your top images, and watch the traffic roll in.
FAQ
What exactly is image link building and why does it matter?
Image link building is the practice of turning a visual asset into a backlink magnet. When someone embeds your picture on their site and credits the source, the tag often contains a link back to you. That link passes authority, boosts your domain’s SEO, and can funnel referral traffic straight to the page where the image lives. In short, a well‑optimised image becomes a tiny landing page that works 24/7.
How can I spot images in my library that are ready for link building?
Start by pulling a CSV export of every file name, size, and alt text from your CMS. Filter out anything under 1,200 px on the longest side or that looks generic (think “IMG_1234”). Then match the remaining files against the keywords you already rank for. If the picture illustrates a product, a process, or a niche concept you’ve written about, it’s a prime candidate for outreach.
What’s the best way to name image files so search engines get the signal?
Keep it short, descriptive, and hyphen‑separated. Swap a name like IMG_9876.jpg for something like eco‑friendly‑coffee‑cup.jpg. Aim for five words max and include your primary keyword near the front. Avoid underscores, special characters, or dates that don’t add relevance. A clean filename tells Google what the picture is about before it even reads the alt text.
How should I write alt text that satisfies both users and crawlers?
Think of alt text as a mini‑caption you’d read aloud to a friend. Make it a short, vivid sentence that naturally includes the target keyword. For example, “Reusable bamboo‑lid coffee cup on a wooden desk, perfect for eco‑friendly offices.” Avoid keyword stuffing; the goal is clarity. If the image is decorative only, a simple “decorative” flag tells assistive tech to skip it.
Can I protect my images from hotlink abuse without killing the backlink potential?
Yes. Enable hotlink protection in your CDN or server settings and serve images from a dedicated sub‑domain like img.yourdomain.com. Then whitelist the domains you’ve earned backlinks from so their embeds still work. This keeps bandwidth safe, stops spammy sites from stealing your visuals, and ensures any legitimate backlink still displays correctly.
Which metrics should I track to know if my image link building is paying off?
Start with referral sessions in GA4’s acquisition report – filter by “referral” and look for the source domain. Pair that with conversion events that matter to you (sign‑ups, purchases, demo requests). Calculate a simple ROI: ((Revenue – Cost) / Cost) × 100. Also watch the click‑through rate from image search results; a well‑crafted alt can double that number.
How often should I audit my image library for new link‑building opportunities?
Set a bi‑weekly cadence. Pull the latest export, run it through an image‑SEO checker, and flag any new assets that match emerging keywords or seasonal trends. Retire any image that consistently brings under 10 % of the expected referral sessions or zero conversions. The regular loop keeps your visual portfolio lean, fresh, and always ready to earn links.