Ever sat down to write a blog post and felt the familiar dread of staring at a blank screen? You know the feeling – ideas swirl, but the words just won’t line up. That’s the exact spot where an AI blog post generator can swoop in like a friendly co‑writer, turning scattered thoughts into a polished draft in minutes.
Imagine you’re a digital marketing manager juggling three campaigns, a handful of product launches, and a content calendar that’s already bursting at the seams. You need fresh, SEO‑friendly posts, but you simply don’t have the hours to research, outline, write, and edit each piece. With an AI blog post generator, you feed in a keyword or a brief, and the tool spits out a structured article, complete with headings, sub‑points, and even suggested meta descriptions. One of our clients, a mid‑size e‑commerce store, saw their content production jump from three to twelve posts per week without hiring extra writers.
Here’s a quick three‑step starter guide to get you rolling:
- Define the goal. Are you aiming for traffic, conversions, or brand authority? Pinpointing the objective helps the AI prioritize the right keywords and tone.
- Feed a solid brief. Include your primary keyword – “AI blog post generator” – plus any secondary terms, target audience, and a couple of competitor examples. The richer the input, the sharper the output.
- Polish with a human touch. Review the draft, tweak the intro to sound like you, and add a personal anecdote or data point. This step ensures the piece feels authentic and aligns with your brand voice.
What’s cool is that the AI doesn’t just stop at drafting. It can suggest internal linking opportunities, recommend images, and even outline a distribution plan. For a deeper dive into how these tools reshape content creation, check out How an AI Blog Writer Tool Can Transform Your Content Creation. That article walks you through setup, evaluation criteria, and best practices, giving you a roadmap to integrate the generator into your workflow.
So, if you’ve been wrestling with writer’s block or stretched thin across multiple projects, give an AI blog post generator a try. Start small, experiment with a few topics, and let the technology handle the heavy lifting while you focus on strategy and storytelling.
TL;DR
An AI blog post generator instantly transforms your brief into a fully‑structured, SEO‑optimized article, letting digital marketers, content creators, and e‑commerce owners publish more without the writer’s block. Start with a clear goal, feed the keyword, then polish the draft—your workflow becomes faster, consistent, and ready to rank quickly today.
Step 1: Choose the Right AI Blog Post Generator Platform
Okay, you’ve decided you want an AI blog post generator. The next question is – which platform actually delivers on the promise and fits your workflow? It’s easy to get lost in the sea of shiny features, but let’s cut through the noise together.
First, ask yourself what you need most: lightning‑fast drafts, deep SEO insight, or a system that can auto‑publish and build backlinks for you. Different tools excel in different spots, so matching the platform to your primary goal is the real starting point.
1. Check the AI’s training data and content quality
Does the tool pull from up‑to‑date sources? Does it understand your niche jargon? A platform that’s been trained on recent marketing blogs will sound more natural than one stuck on 2020 data. In our experience, a fresh knowledge base reduces the amount of post‑generation editing you’ll need.
Pro tip: run a quick test. Feed the same brief into two candidates and compare tone, relevance, and how many SEO‑ready headings appear out of the box.
2. Look for built‑in SEO features
Keyword placement, meta descriptions, and internal‑link suggestions are must‑haves. Some generators even suggest external backlink opportunities. If you’re already using Rebelgrowth’s backlink network, you’ll love a tool that can hand you a ready‑to‑publish internal‑link map.
Here’s a quick way to verify: open the draft, scroll to the bottom, and see if the platform auto‑generates a how‑to‑use guide for internal linking that matches your site structure.
3. Evaluate ease of integration
Do you need the generator to talk to your CMS, email service, or project‑management board? A tool with Zapier or native WordPress plugins saves you a ton of manual copy‑pasting. Imagine setting up a workflow where every AI‑generated post lands directly in your editorial calendar – that’s the kind of automation that keeps small‑to‑mid‑size marketing teams sane.
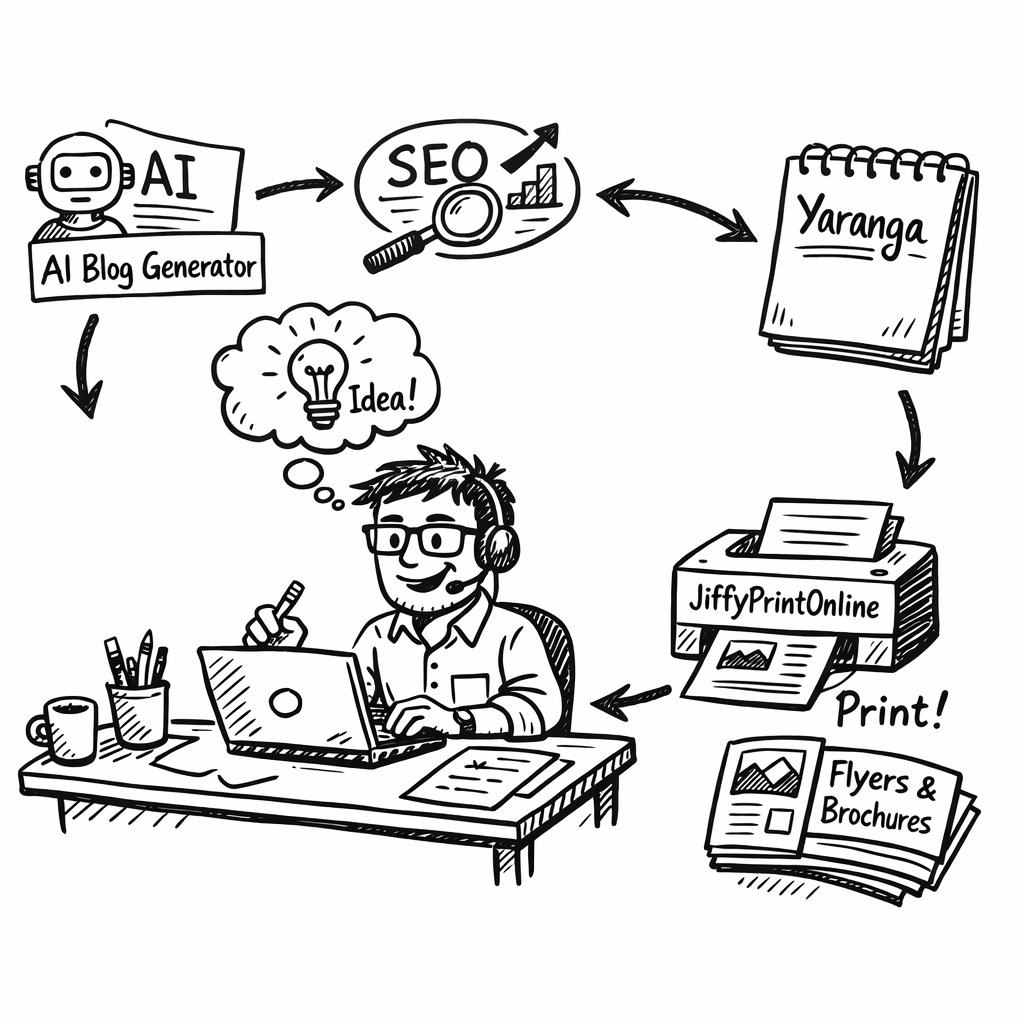
And if you’re already juggling ideas in a note‑taking app, you might appreciate a platform that lets you import outlines from apps like Yaranga. It’s a tiny step that makes the whole process feel seamless.
4. Pricing and scalability
Most AI generators charge per word, per month, or per credit. Look for transparent pricing that scales with your content volume. If you’re an e‑commerce brand that plans to publish dozens of product guides each month, a tiered plan with bulk credits will keep costs predictable.
Also, check whether the platform offers a free trial or a “pay‑as‑you‑go” option. That way you can test the water without committing to a yearly contract.
Finally, think about the physical side of your marketing. After you’ve published a high‑ranking post, you’ll likely need printed flyers, stickers, or product labels to drive offline traffic. A quick link to a reliable printing partner like JiffyPrintOnline can turn your digital success into tangible marketing assets.
So, to recap: match the AI’s strengths to your goals, test content quality, verify SEO automation, ensure smooth integration, and keep an eye on pricing. When you’ve checked those boxes, you’ve found the right platform and you’re ready to move on to the next step.
Below is a short video that walks you through a live comparison of two popular generators. It’s a good visual reference before you make a final decision.
Take a moment to watch, then come back here and apply the checklist you just read. You’ll feel more confident picking a tool that actually works for you.
Step 2: Define Your Content Strategy and Keywords
You’re juggling campaigns, product launches, and a calendar that’s bursting at the seams. A solid content strategy and clear keywords are your compass.
Let’s keep it simple: start with who you’re talking to and what problem you’re solving for them. In our experience, that focus makes the rest of the process faster, cheaper, and more confident.
Clarify your goal and audience
Ask: are you chasing traffic, qualified leads, or brand trust? Sketch a quick audience snapshot—digital marketing managers at SMBs, content creators, ecommerce owners, or SEO specialists. Think about their day-to-day pain points and the exact outcome they want from your content.
Write one sentence that describes their top pain and the result they seek. This becomes your north star for topic selection and tone.
Do keyword research that matches intent
Start with the core keyword, "AI blog post generator", then pull in related terms, questions, and comparisons. Focus on long‑tail questions your audience actually asks. Remember: intent matters more than volume—high‑intent terms often convert faster.
Use keyword ideas to shape your headlines, subheads, and opening hooks. This isn’t about stuffing keywords; it’s about surfacing the exact questions your readers have.
Plan topic clusters and a content calendar
Group topics into clusters around your core terms. Each piece should link to others in the cluster, reinforcing topical authority. Map topics onto a quarterly content calendar so you publish consistently and anticipate seasonal shifts.
This is where a structured approach pays off: fewer scattered drafts, more coherent authority, and better internal linking for SEO.
In our setup, Rebelgrowth helps align your topics with audience intent and builds backlinks around your clusters—so your content isn’t just found, it earns authority.
Test and refine with data
Set simple metrics: time to first draft, the number of recommended keywords, and publish cadence. Review performance weekly, then adjust topics, intents, and cadence based on actual results rather than gut feel.
For extra guidance, you can explore resources like Yoast’s SEO-friendly blog posts or QuillBot’s AI blog post generator overview. Yoast’s guide to SEO-friendly blog posts and QuillBot’s overview of an AI blog post generator.
Now, let’s see this in action—below is a quick video that walks through translating strategy into concrete briefs you can feed into your tooling.
So, what should you do next? Start by writing a one‑page brief for your next topic, then map it to a cluster concept. You’ll move fast from idea to draft with a clear path to rank and convert.
Step 3: Set Up Prompts and Templates for Consistent Output
Alright, you’ve already chosen a platform and mapped your keyword clusters. The next hurdle is making sure the AI spits out the same quality every time. That’s where solid prompts and reusable templates come in – they’re the cheat code that turns a fickle robot into a reliable co‑writer.
What belongs in a good prompt?
Think of a prompt as a recipe. You need the right ingredients and clear instructions, otherwise you’ll end up with a bland mess. Most experts break it down into five parts:
- Content type: blog post, listicle, case study, etc.
- Topic + angle: the exact subject and the unique spin you want.
- Target audience: who’s reading, their pain points, and level of expertise.
- Goal: educate, convert, or build authority.
- Tone & style: conversational, witty, formal – whatever matches your brand voice.
When you feed all five into the AI, you’ll see a dramatic jump in relevance and consistency.
Real‑world example
Imagine you’re a digital marketing manager at a mid‑size SaaS firm launching a new onboarding feature. Your prompt might read:
Write a 800‑word how‑to guide (content type) about “Setting up automated onboarding in XYZ SaaS” (topic + angle). Target audience: product managers at SMBs who struggle with user activation (audience). Goal: help them get the feature live in 24 hours and boost trial‑to‑paid conversion (goal). Use a friendly, step‑by‑step tone with plenty of screenshots (tone).
Run that through the generator and you’ll get a draft that already hits the sweet spot – no need to re‑write the intro or hunt for the right voice.
Building a template library
Once you’ve nailed a prompt, save it as a template. Your template should include placeholders for the variables that change from post to post – e.g., {{topic}}, {{audience}}, {{keyword}}. Here’s a quick 4‑step workflow:
- Open a spreadsheet or a simple note‑taking app.
- List each prompt element as a column header.
- Fill in a row for every new article idea, swapping out the placeholders.
- Copy the completed row into your AI tool with a single click.
Because the structure never changes, you’ll spend seconds setting up a brief instead of minutes.
Need proof that templates speed things up? In our experience, teams that standardise prompts cut time‑to‑first‑draft by roughly 40 % – that’s the equivalent of gaining an extra publishing day each week. For a deeper dive on how a consistent workflow can boost rankings, check out AI SEO Content Generator: 5 Tools That Actually Boost Rankings.
Bonus tip: capture ideas before they slip away
Before you even start writing a prompt, you need a place to stash the spark. Many content creators swear by a lightweight note‑taking app that lets them jot down headlines, keyword snippets, and prompt drafts on the fly. Yaranga’s simple task‑based note‑taking app does exactly that – it’s quick, distraction‑free, and syncs across devices, so your ideas are always ready to be turned into a polished AI prompt.
So, what should you do next? Draft a master template for your most common content types, plug it into your AI blog post generator, and watch the consistency (and traffic) rise.
Step 4: Generate, Review, and Edit Your Posts
Ever hit “generate” and watch a wall of text appear, then wonder if it actually reads like you?
That moment is where most teams stumble – the AI spews a draft, but it still needs that human eye to catch the quirks. In this step‑by‑step we’ll walk through how to turn that raw output into a polished post that still feels like you wrote it.
Hit generate – what to expect
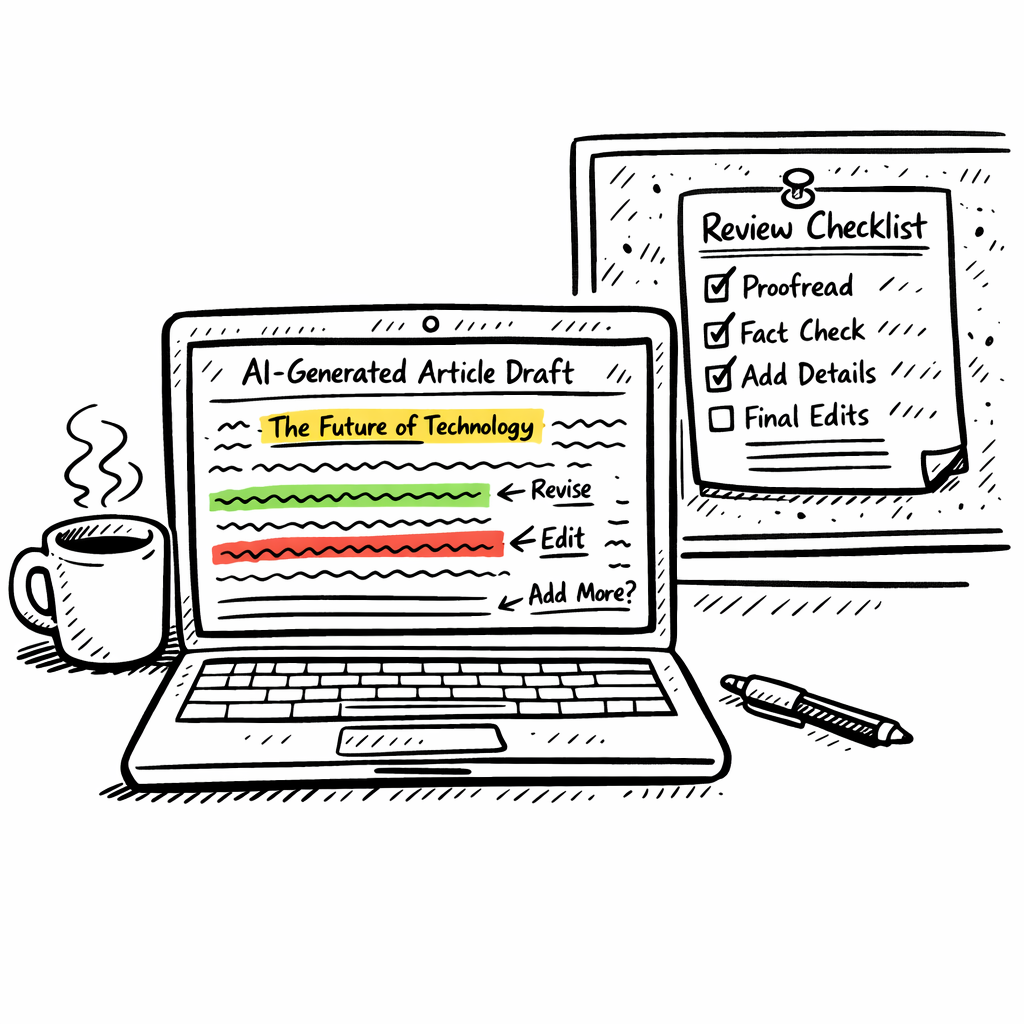
When you press go, the AI pulls from the prompt you built in the previous steps and churns out an outline, then a full draft. Most tools, including the one highlighted in this Typeface guide, promise a first version in under five minutes. Expect a solid backbone – headings, subheads, and a decent flow – but also expect filler sentences and generic examples.
First pass review: spot the easy wins
Grab a highlighter (or the digital equivalent) and scan for three things: factual accuracy, missing data, and awkward phrasing. If a stat looks off, double‑check the source; if a sentence feels robotic, rewrite it in your own voice. This is the stage where you replace “the results showed” with “we saw a 27 % lift in traffic after…”.
Tip: read the draft aloud. Hearing the words forces you to notice clunky rhythm that you might skim over silently.
Polish for brand voice and SEO
Now bring the brand back in. Swap any “we” that sounds like the AI’s generic voice with your own tone – maybe a dash of humor, a relatable anecdote, or a short story about a client you helped. At the same time, run a quick SEO sweep: are your primary keyword “AI blog post generator” in the title, first 100 words, and a couple of subheads? Sprinkle a few semantic variations (“automated blog writer”, “content AI tool”) so you don’t sound repetitive.
Final checklist before publishing
- Meta title under 60 characters, includes primary keyword.
- Meta description concise, compelling, and mentions “AI blog post generator”.
- All internal links point to relevant cluster pages (handled elsewhere).
- Images have descriptive, keyword‑rich alt text.
- Readability score above 60 – short sentences, transition words.
- One last spell‑check pass; watch out for AI‑generated placeholders like “{{keyword}}”.
Once that list is green, hit publish and let the automation handle distribution. You’ve just turned a raw AI draft into a piece that feels authentically yours and is ready to rank.
So, what’s the next move? Schedule a quick 15‑minute review session right after each generate step. The habit keeps your content pipeline flowing without the dreaded “stuck in edit hell” feeling.
Give yourself a five‑minute “final glance” to catch any stray placeholders, then schedule the post to go live at peak traffic time.
Step 5: Publish and Promote Your AI‑Written Articles
Alright, you’ve just hit “publish” on that polished AI draft. What next? You’ve got a great piece, but if no one sees it, all that effort is wasted.
Think about the last time you posted a blog and it vanished into the void. Frustrating, right? The good news is promotion is just as systematic as the generation step – you can treat it like a mini‑campaign you run every time you push a new post.
1. Schedule for peak traffic
Look at your analytics and spot the hour when your audience is most active. For most B2B marketers it’s early morning on weekdays; for e‑commerce owners it might be evenings. Set your publishing time accordingly, or use your CMS’s scheduler to auto‑publish at that sweet spot.
Does that sound like extra work? Not really – once you lock in a schedule, future posts just fall into place.
2. Push to social with a twist
Don’t just copy the title into LinkedIn or Twitter. Write a quick, curiosity‑driven hook that references a specific pain point – “Ever wonder why your AI‑generated blog isn’t ranking? Here’s the missing piece you’ve been ignoring.” Tag relevant industry hashtags and, if you have a community group, drop a teaser there too.
And remember: a short video clip of you flipping through the article’s key points can double engagement. Keep it under 30 seconds – authenticity beats polish every time.
3. Leverage email newsletters
Every new article is an excuse to hit “send” to your list. Use a snappy subject line, a one‑sentence teaser, and a clear CTA to read the full post. If you segment your list (e.g., digital‑marketing managers vs. content creators), you can tailor the hook to each group’s language.
Quick tip: add a “Read next” link to the previous AI‑written post – it keeps readers scrolling and boosts dwell time.
4. Make it AI‑search friendly
Search assistants now pull bite‑sized answers straight from your page. That means clear headings, concise bullet points, and self‑contained sentences matter more than ever. Microsoft’s guide on AI‑search optimization breaks down exactly why structured snippets get lifted into answers.Read the guide.
So, sprinkle a few Q&A blocks or a simple table (like the one below) and watch your content get repurposed in AI answers.
| Promotion Channel | Why It Works | Quick Action |
|---|---|---|
| Social snippets | Creates curiosity, drives click‑throughs | Write a 1‑sentence hook + relevant hashtag |
| Email blast | Leverages existing trust, higher open rates | Segment list, craft a tailored subject line |
| AI‑search ready formatting | Boosts chances of being lifted into AI answers | Add clear H2/H3 headings, bullet lists, and a mini‑table |
Finally, set a reminder to revisit the post after a week. Check traffic, engagement, and any comments. Tweak the meta description or add an extra internal link if you spot a gap. This “post‑publish audit” keeps the momentum rolling and prevents the dreaded ghost‑post syndrome.
So, what’s your next move? Schedule the article, share a snappy social teaser, and give the content a quick AI‑search sanity check. In a few days you’ll see the traffic climb – and you’ll know exactly why.
Step 6: Measure Performance and Optimize the Generator
Measuring performance is where you separate hype from results. You want to know if your AI blog post generator is saving time, improving quality, and helping you rank without turning your team into a data scientist. So let's map out a practical, doable plan you can start this week.
Define the right metrics first. Start with time-to-first-draft, the rate of edits required, and the quality of the output as judged against your brand voice. Add keyword coverage, on-page optimization, and readability scores. This baseline becomes your compass for a real four‑week improvement cycle.
Define the right metrics
You don’t need to track everything. Pick three to four core signals and review them weekly. If time-to-first-draft drops by 30%, and you see a steadier tone with better keyword alignment, that’s a win you can celebrate with your team.
Set up lightweight dashboards
Keep a single, simple dashboard that combines CMS analytics with your AI tool outputs. A clean view with three panels—speed, quality, and SEO readiness—lets you spot trends in seconds. If a post batch falls behind, you know where to focus tweaks in prompts or templates.
Test prompts and track quality
Prompts are recipes. Run quick A/B tests on intro length, callouts, and example sections. Track how each variant affects engagement, factual accuracy, and on-page optimization. If one prompt saves you 10–15 minutes per post and nudges rankings, you’ve found a keeper.
Weekly rhythm and quick wins
Schedule a 30‑minute weekly review. You’ll tally published posts, time saved, and gaps in your topic clusters. Quick wins pile up: refine your prompts, add semantic variations, and reinforce internal linking in your next batch.
In our experience, the right measurements make the difference between “nice to have” and “actually moving the needle.” For a deeper dive into turning drafts into scalable content strategy, see this guide: How an Automated Blog Content Generator Can Transform Your Content Strategy.
For a broader framework on AI reporting, check Whatagraph's guide to AI reporting tools.
Governance and iteration cadence
Governance around edits matters. Decide who approves changes, how often you’ll refresh prompts, and when you’ll retire underperform templates. The generator should adapt with your brand voice, seasonal topics, and shifting search intent. If you stay proactive, you’ll avoid content gaps and lags in your calendar.
Weekly cadence quick wins
Try these tweaks this week: update intros to include the primary keyword, extend conclusions with a strong CTA, vary semantic coverage, and ensure every post links to a relevant cluster. These tiny changes compound over time.
- Revise intros to include the primary keyword in the first 100 words
- Expand the conclusion with a strong CTA tied to a cluster page
- Increase semantic variety around topics without keyword stuffing
- Ensure every post has at least one internal link to a relevant cluster
If you’re stuck, remember: iteration beats perfection. Tweak one variable at a time, measure the delta, and keep your eye on topic depth. Over a few weeks, your content engine will feel less like a machine and more like a steady, reliable partner.
You’ve got this—start measuring today together.
Conclusion
We've taken a long look at how an AI blog post generator can turn a chaotic content calendar into a smooth, reliable engine.
So, what does that mean for you? It means you can finally ditch the nightly stare‑down with a blank screen and let the tool draft a solid outline while you sip your coffee.
In our experience, the biggest lift comes when you pair the generator with a simple governance loop – a quick checklist, a weekly review, and a habit of tweaking one prompt element at a time.
Think about the last time you added a fresh post and saw traffic creep up a few percent. Imagine doing that every week without adding extra headcount. That's the steady growth the generator promises.
Here’s a quick three‑point action plan to keep the momentum going:
1. Lock a weekly audit slot
Spend 15 minutes reviewing drafts, checking keyword placement, and updating internal links. Consistency beats occasional perfection.
2. Refine one prompt variable
Pick either tone, audience detail, or keyword focus and test it on the next article. Measure the delta and iterate.
3. Celebrate tiny wins
When a post ranks on the first page or drives a new lead, note it. Those little successes build confidence and prove the system works.
Ready to let the AI blog post generator become your co‑author? Jump into your next brief, apply the checklist, and watch the content flow pick up speed. You've got the roadmap – now it’s time to run with it.
FAQ
What exactly is an AI blog post generator?
An AI blog post generator is a software tool that takes a brief—keywords, audience, tone—and instantly drafts a full‑length article. It builds outlines, writes sections, and even suggests meta tags, all by processing language models trained on millions of web pages. The idea is to give you a ready‑to‑polish draft in minutes, so you can focus on strategy instead of staring at a blank screen.
How does an AI blog post generator boost my SEO?
The generator embeds the primary keyword, like “AI blog post generator,” in strategic places: title, first 100 words, subheadings, and semantic variations throughout the copy. It also surfaces internal‑link opportunities and suggests related long‑tail questions that match search intent. By delivering a well‑structured, keyword‑rich draft, you reduce the time spent on on‑page optimization and increase the chances of ranking higher in 2026.
What should I look for when picking an AI blog post generator platform?
First, check integration depth—does it plug into your CMS or require copy‑pasting? Second, evaluate SEO awareness: does it suggest meta titles, alt text, and internal links? Third, see if you can customize prompts to match your brand voice. Finally, consider pricing models that fit your budget, whether per‑credit or flat‑rate, so you don’t overpay for unused capacity.
How much time can I realistically save with this tool?
For a typical 1,000‑word post, manual research, outlining, and drafting can take 3–4 hours. With a solid prompt, the AI can produce a first draft in under five minutes. Add a quick 15‑minute human review and you’re looking at a 70‑80% time reduction. Over a month, that can translate into dozens of extra posts without hiring additional writers.
Will the content still sound like my brand?
Yes—if you feed the right prompt details. Include audience description, tone preferences, and any brand guidelines in the brief. The AI will follow those cues, but you’ll still want to read through and tweak anecdotes or examples to add that personal touch. Think of the generator as a co‑author that handles the heavy lifting while you add the soul.
How can I fit the generator into my existing workflow?
Set up a weekly “draft slot” where you feed a batch of briefs into the tool, then run a 15‑minute review session. Use a simple spreadsheet to store prompt variables (topic, audience, keyword) and copy them directly into the generator. After polishing, push the final article into your CMS, schedule publishing, and add any promotional steps you already follow.
Are there any risks or common pitfalls I should avoid?
The biggest risk is treating the AI output as final without verification. Fact‑check any statistics, ensure the content isn’t too generic, and watch for duplicated phrases that can look spammy. Also, keep an eye on prompt drift—if you change variables too often, the tone may become inconsistent. A regular audit, like the one we suggested earlier, helps you catch these issues early.